
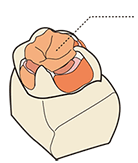
 Jacket Crown
 Facing Crown
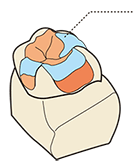
 Posterior (Jacket)
 Posterior (Inlay)
| LED CURE Master | Other General Light Curing Machines | ||
|---|---|---|---|
| Invisible Opaque | 10 sec. | 90 sec. | |
| Opaque |
30 sec. | 180 sec. | |
| Body (Dentine, Enamel, etc) |
Base |
90 sec. | 180 sec. |
| Others |
10 sec. | 60 sec. | |
| Stain |
10 sec. | 60 sec. | |
| Final Light Curing | 90 sec. | 180 sec. | |

step.1
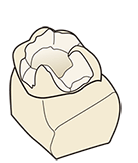
Block out undercut area in a cavity with paraffin wax and apply TWiNY resin separator.
step.2
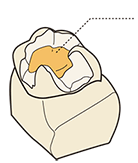
Apply Opaque Dentine A3.5 on the bottom of the cavity. Opaque Dentine is used in cases where sufficient thickness for resin layering has not been secured.
step.3

Apply Dentine A3.5 at the bottom of the cavity on the buccal side, lingual side, and adjacent side.
step.4
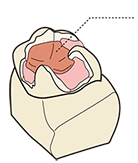
Apply AM as a base to give expression to depth of occlusal surface center.
step.5

In order to gain lens effect (underlying color) from cavity marginal zone, apply CT3 on the cavity wall area. Apply around cusp area of occlusal surface.
step.6
In order to gain lens effect (underlying color) from cavity marginal area, apply CT2 on the cavity marginal area. Apply around streamline of occlusal surface.
step.7
Apply Enamel 3 on posterior enamel layer, matching the color etc. with adjacent teeth.
For glazing, use TWiNY C&B diamond polisher. In cases of making Onlay and 1st class Inlay, the process from step 4 to step 7 can be undertaken for the prepared cavity so that the color tone will be closer to natural.
For fixing in the mouth, resin cement is recommended as an adhesive.


Yamakin will respond to inquiries received on
Saturdays, Sundays, public holidays,during the year-end or
New Year holidays or company holidays after the following business day.
News
Photo Gallery
![]()
3-7 Sanadayama-cho, Tennoji-ku, Osaka 543-0015, Japan
:
: http://www.yamakin-global.com
+81-6-6761-8338
All Rights Reserved.
PAGE TOP


